KPHL - 1:400

Amazing work man! Exited to see the finished product. DCA Concourse D with the US Airways stuff would also look great.

Thanks! It’s in the works eventually for me. I can only undertake so many projects until it becomes too overwhelming for me😅. Ideally If love to do the full concourse D with the whole open ramp of dash 8s, crj200s and the others!
 
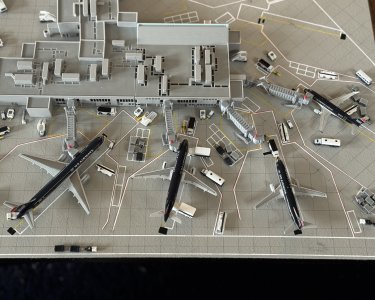
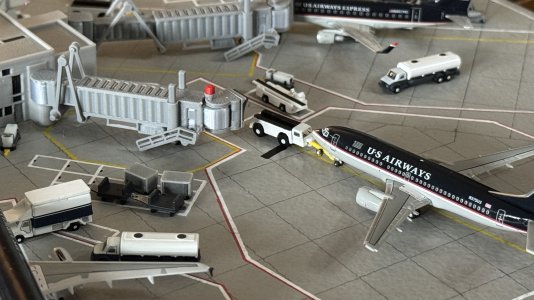
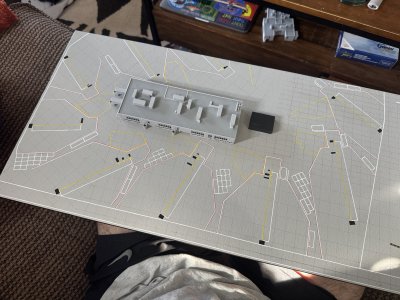
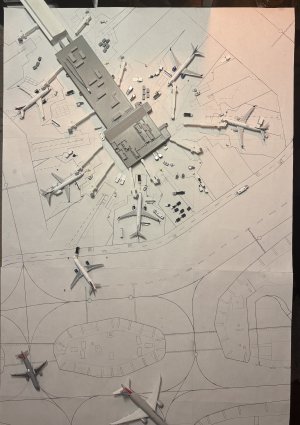
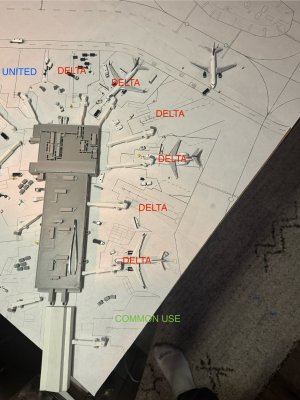
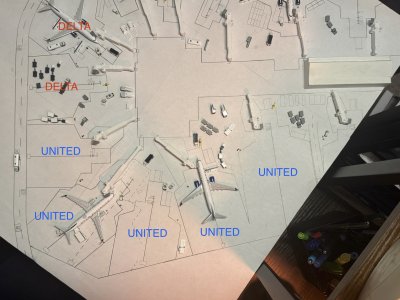
I told myself i’d wait till more was complete but I had to set up a quick diorama to check spacing and make sure everything was still good! These jetways are from my PIT diorama and I think I want to try Clippers new jetways he just released so I may upgrade to brand new ones once this board is more complete. It will be a slight pain as some need to be very specific sizes (example being where that 757 is parked) and most of them will have to be quite short. I’m still working on this board today and hopefully I can get one or two more gates mostly finished by the time the next update comes through. Enjoy!
IMG_4521.jpeg
IMG_4523.jpeg
 
I told myself i’d wait till more was complete but I had to set up a quick diorama to check spacing and make sure everything was still good! These jetways are from my PIT diorama and I think I want to try Clippers new jetways he just released so I may upgrade to brand new ones once this board is more complete. It will be a slight pain as some need to be very specific sizes (example being where that 757 is parked) and most of them will have to be quite short. I’m still working on this board today and hopefully I can get one or two more gates mostly finished by the time the next update comes through. Enjoy!
View attachment 53362
View attachment 53363

I like how, in the first pic, we see from the biggest to the smallest, from left to right! 😆
 
Another brief update shot! All gates are finished now and taxiway work has started. All that’s left to do on the C side is the centerline and jetway safety zone striping (can you tell i’m putting off the inevitable?😅😅) excited to start weathering things as that will bring everything together better.
IMG_4536.jpeg

Most of my spacing has worked out well except this gate. The jetway rotunda attatched to the terminal is just about directly in front on the nose so it can’t interact with planes perfectly - if at all. I’ll have to chop off the little extension and glue it just a couple mm farther down to work correctly. this is a l o n g jetway and some custom work might be in order for it to fully work!
IMG_4537.jpeg
 
Been a couple days but i’m starting work on the B side of things. One day at a time…

The gate to the left is one of the few at B/C that can technically hold US Airways’ 767-200s. That rarely occurred however as both Terminals B and C here were domestic only. On rare LAX or SFO type of flights were they used at these terminals.

IMG_4689.jpeg
 
Long time no work getting done…let’s finally change that.

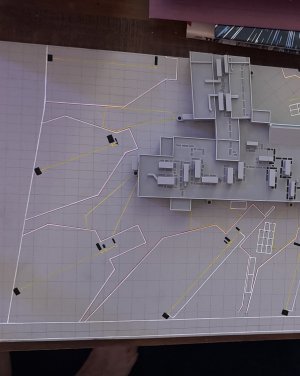
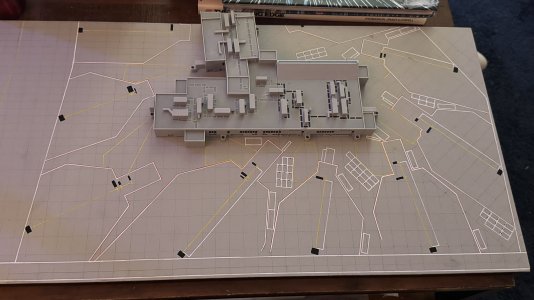
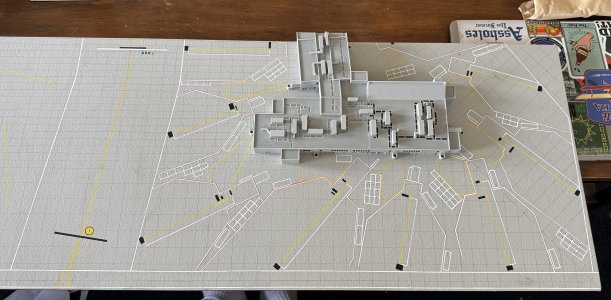
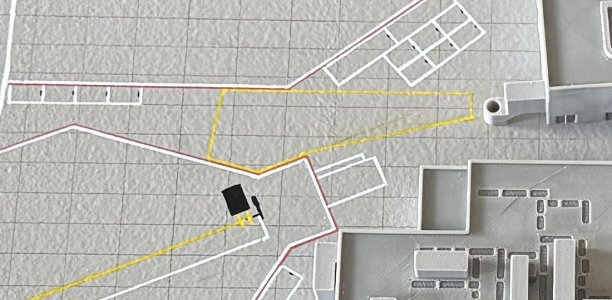
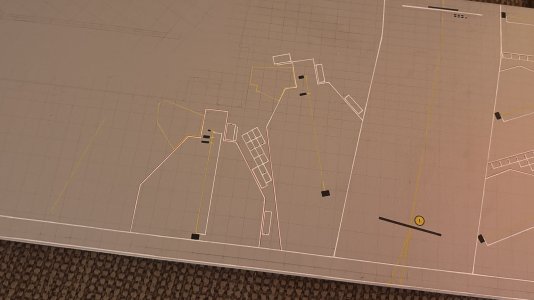
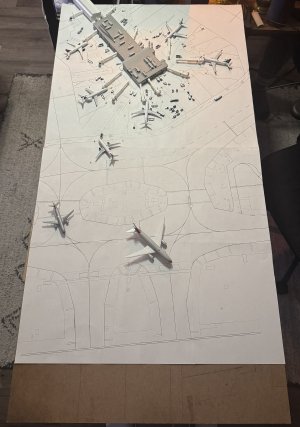
The last few days i’ve been tediously painting the concrete color onto the board, doing concrete lines and getting my spacing correct. I’ve started with laying out the taxiway between both terminals and sketching out the service road that stretches the bottom of all piers in PHL. My white marker ran out so I couldn’t get very far as you can see. While some new ones come in i’ve been able to start the gate centerlines instead. Everything is laid out and this is how most of my dioramas tend to look at this stage. All the important stuff is generally all here now and I can start focusing in on detailing each section at a time.

More updates to come once those pens come in. Should be next Tuesday. Excited to start this back up again!

View attachment 52403
View attachment 52404
View attachment 52405
View attachment 52406
My question is how do you translate the markings and everything from the sketches to the board so easily?
 
My question is how do you translate the markings and everything from the sketches to the board so easily?

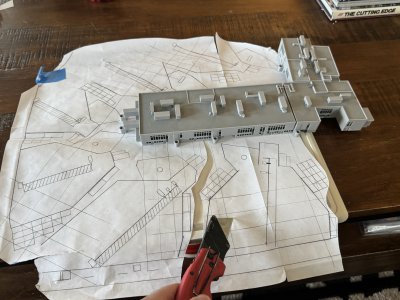
I will show that process tonight for you! I basically use the “sketches” as loose tracers. I exacto knife out around the gate boundaries and start doing my outlines there. then all the smaller markings surrounding all of them. It will make sense when I get some photos when i’m off of work!
 
I will show that process tonight for you! I basically use the “sketches” as loose tracers. I exacto knife out around the gate boundaries and start doing my outlines there. then all the smaller markings surrounding all of them. It will make sense when I get some photos when i’m off of work!
I feel like getting all the markings to fit is my biggest turn off to doing a hand crafted layout, but I've started to plan out a small JRO diorama because it seems quite simple enough.
 
I feel like getting all the markings to fit is my biggest turn off to doing a hand crafted layout, but I've started to plan out a small JRO diorama because it seems quite simple enough.

It’s hard until you do it a couple times. Airports have certain regulations depending what aircraft go where of course and there’s some loose literature surrounding certain airports and FAA/global requirements and regulations.

Seattle actually has documents online for their ground markings and what lines go where and how big/long each line is which is fun. For example on PHL here, I haven’t found anything online like Seattle’s but if you look at nearly every other US Airways owned gate from 2005-2015 you’ll see they’re all the same basic shape. Anything up to an A320/21 on this diorama is the “triangle with a box top” as I’ll call it. I’ve made the max width on those to be ~1 7/8in on each side of the centerline, as in scale that’s generally about how wide that space is to accommodate those aircraft. The 757 gates change by adding the flat perpendicular lines in front of the engines, and also increases overall width to ~2in on each side of the centerline. Some airports are even a touch bigger to specifically accommodate winglet 75s easier. The 767 gates are the 757 shape, but bigger now! Every US Airways gate (mostly) has always looked like these which becomes easy to replicate as you do things. Certain gates will also have their own quirks depending on space requirements and all that fun stuff which does make it more difficult.

I am home now and want to work on this anyways so let me do a new gate and try to remember to take photos during the process!
 
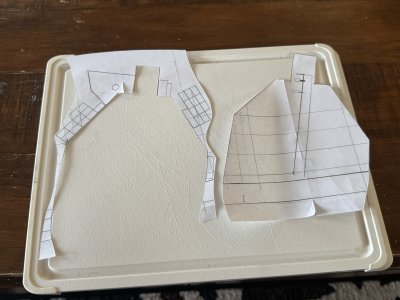
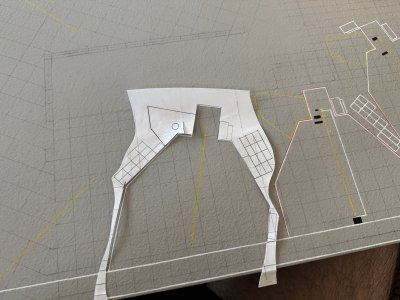
First I take my trace and cut out a certain area, for this board i’m cutting out each gate as I go along like so:
IMG_4700.jpeg

Next I slice where i want to start, in most cases with gate markings, I’ll start with the aircraft safety perimeter:
IMG_4701.jpeg

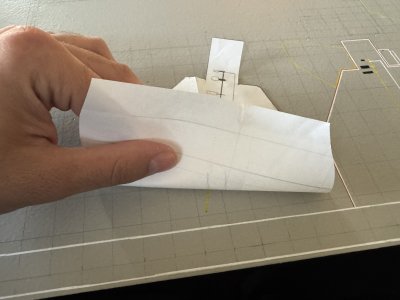
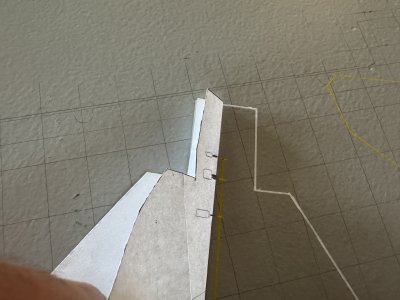
Next, I align onto my centerlines to make sure i’m in the correct spot. If you don’t have center lines yet you can always start with that first by doing what i’m doing in the photo. Y be able to see by folding your paper where each line can go and how long each one should be:
IMG_4702.jpeg

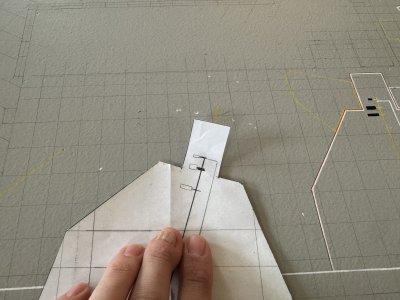
Next I make small hashes around each corner and get my reference dots. It’s all about connecting the dots from here! Details are easy to replicate by feel after this generally. Once you find the sizes for things that look good you can replicate the dimensions at every gate (belt loader boxes, baggage cart boxes, tug and push bar boxes, etc)
IMG_4703.jpeg

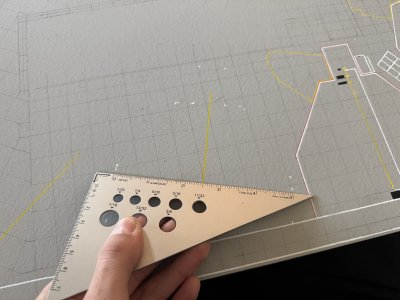
“Last” step is getting my final width just to make sure things are all the same. I cross reference with my cutout of the gate and make sure nothing is drastically different for any reason. for example, this gate is another 762 sized gate so it gets 2 1/2in on each side of the center line:
IMG_4704.jpeg
 
It’s hard until you do it a couple times. Airports have certain regulations depending what aircraft go where of course and there’s some loose literature surrounding certain airports and FAA/global requirements and regulations.

Seattle actually has documents online for their ground markings and what lines go where and how big/long each line is which is fun. For example on PHL here, I haven’t found anything online like Seattle’s but if you look at nearly every other US Airways owned gate from 2005-2015 you’ll see they’re all the same basic shape. Anything up to an A320/21 on this diorama is the “triangle with a box top” as I’ll call it. I’ve made the max width on those to be ~1 7/8in on each side of the centerline, as in scale that’s generally about how wide that space is to accommodate those aircraft. The 757 gates change by adding the flat perpendicular lines in front of the engines, and also increases overall width to ~2in on each side of the centerline. Some airports are even a touch bigger to specifically accommodate winglet 75s easier. The 767 gates are the 757 shape, but bigger now! Every US Airways gate (mostly) has always looked like these which becomes easy to replicate as you do things. Certain gates will also have their own quirks depending on space requirements and all that fun stuff which does make it more difficult.

I am home now and want to work on this anyways so let me do a new gate and try to remember to take photos during the process!
Another good resource now is the simulator. In my opinion there are some amazing hand crafted airports that can help show markings and give insights into different stuff for a model airport.
 
Nose wheel stop lines are easy to get by folding your gate in half and copying what you’ve already done:
View attachment 54273

Jetway safety zones and GSE markings are easily replicated using the “scrap” from before!
View attachment 54274

I hope that helps @PeachStateAviation ! that’s my process for gate markings at least. Other stuff is the same but can be cut up differently depending what it is.
I’ll be sure to use this as a reference for my upcoming project. Thanks for the help! 🙏
 
Top