* 1:400 Scale Hypothetical Airport.

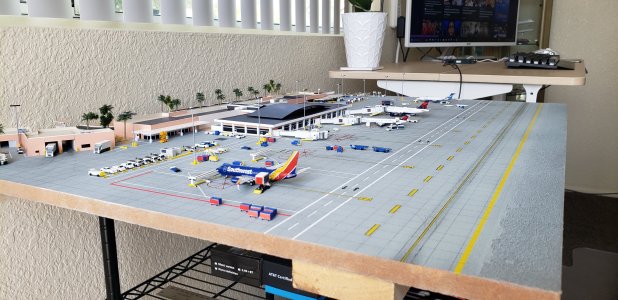
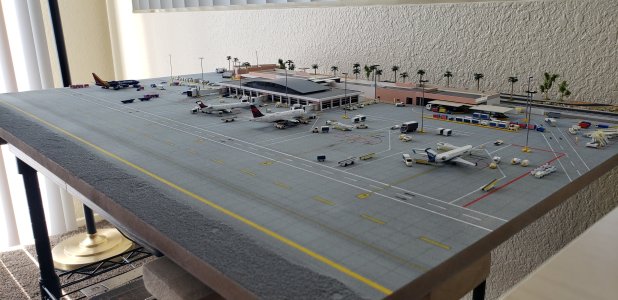
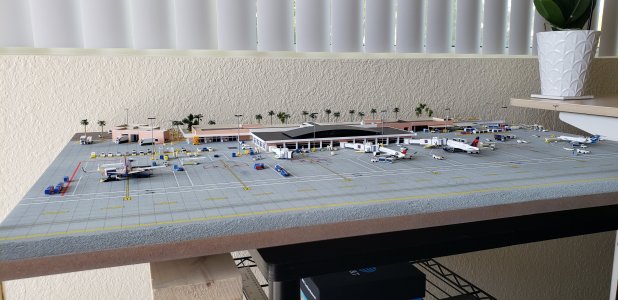
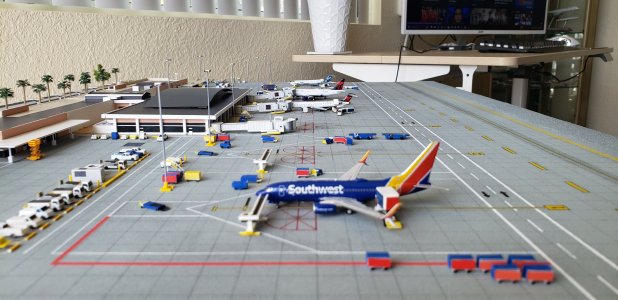
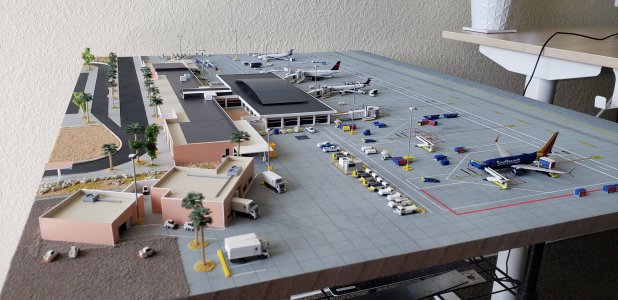
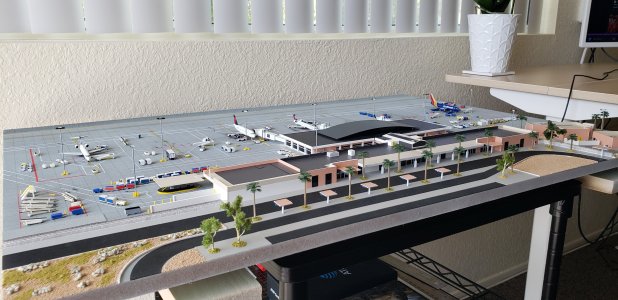
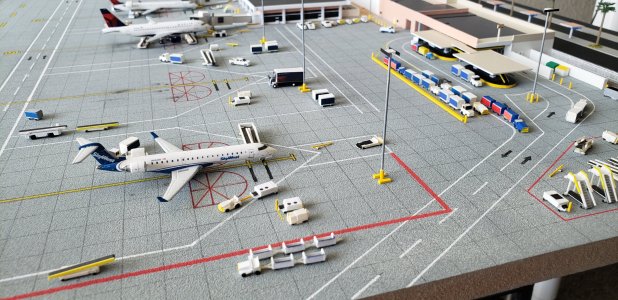
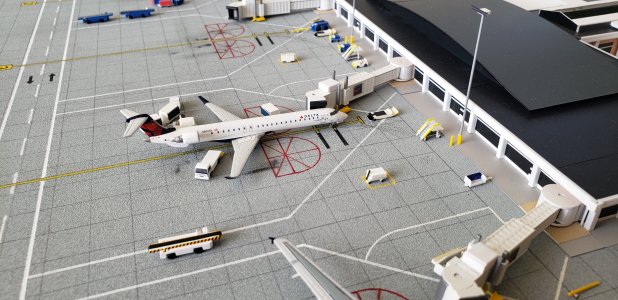
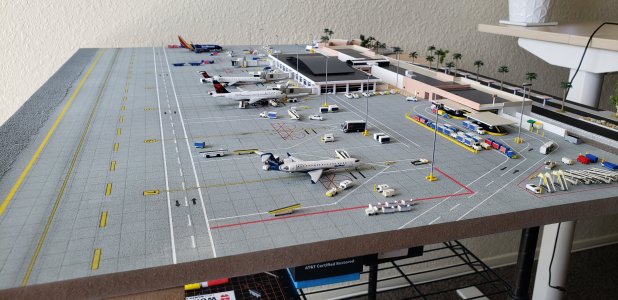
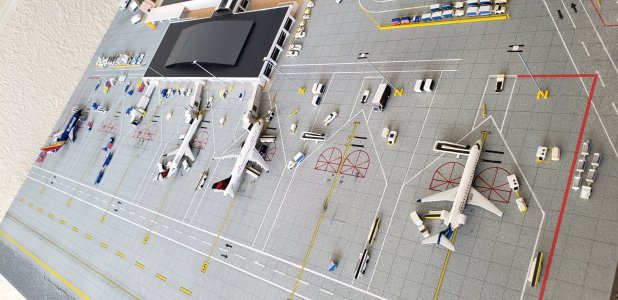
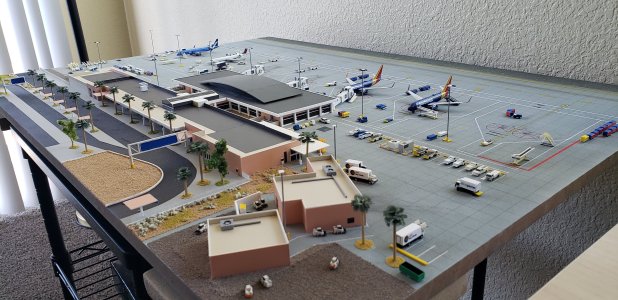
All about done. I might order some more detailed trees and replace them, as I've been using these palms for the last few years on dioramas that were pretty much a budget purchase. I also have a few more details on the apron / taxiway to get completed. Here's the set up with some newly added customized GSE and a few planes for this regional airport. These photos were just quick shots with my S9 phone. I haven't had a chance to add any tcsimages photos yet, however, I'll get around to some outdoor shots with the Carl Zeiss lens with a backdrop as soon as I get around to it. Thank you all again for the nice responses!
 

Attachments

  • 20250619_154943.jpg
    20250619_154943.jpg
    1.4 MB · Views: 15
  • 20250619_155459.jpg
    20250619_155459.jpg
    1.3 MB · Views: 14
  • 20250619_155222.jpg
    20250619_155222.jpg
    1.3 MB · Views: 12
  • 20250619_155154.jpg
    20250619_155154.jpg
    1.2 MB · Views: 13
  • 20250619_155140.jpg
    20250619_155140.jpg
    1.4 MB · Views: 12
  • 20250619_155117.jpg
    20250619_155117.jpg
    1.3 MB · Views: 12
  • 20250619_155055.jpg
    20250619_155055.jpg
    1.9 MB · Views: 12
  • 20250619_155023.jpg
    20250619_155023.jpg
    1.7 MB · Views: 14
  • 20250619_155015.jpg
    20250619_155015.jpg
    1.4 MB · Views: 14
  • 20250619_155008.jpg
    20250619_155008.jpg
    1.8 MB · Views: 14
Looks amazing and love the manageable size! I have to ask a burning question though... Please tell me you manually corrected the horizontal stabs on that SkyWest CRJ-700 because mine point to the sky.
 
Last edited:
Looks amazing and love the manageable size! I have to ask a burning question though... Please tell me you manually corrected the vertical stabs on that SkyWest CRJ-700 because mine point to the sky.
You need to go in with a steady hand and not be afraid of any possible paint chipping. If the paint chips, it should be small, but just be careful.

Take a large enough microfiber cloth (the ones you use to clean screens or glasses with) and place it open on a hard flat surface. Take the plane and gently press the horizontal / vertical stabilizer upside down with your thumb on the bottom of the rear airframe, downwards a few millimeters. If you do it evenly, they should auto correct and remain a bit loose. Take the backing to any sticker or wax paper of some sort and put a micro dab of super glue on it. Take an edge of the paper and put it quickly in the crack where the wings are loose, like you giving it a paper cut. There you go. You should be all set.
 
Never seen that airport. I've looked at a lot of airports in the U.S.... and I really mean A LOT of them and never seen this... That would be a fun build with a little bit of a larger board for an additional four medium body jets.
 

Attachments

  • IMG_5639.jpeg
    IMG_5639.jpeg
    901.4 KB · Views: 12
  • IMG_5637.webp
    IMG_5637.webp
    212.8 KB · Views: 11
  • IMG_5638.jpeg
    IMG_5638.jpeg
    734.7 KB · Views: 14
You need to go in with a steady hand and not be afraid of any possible paint chipping. If the paint chips, it should be small, but just be careful.

Take a large enough microfiber cloth (the ones you use to clean screens or glasses with) and place it open on a hard flat surface. Take the plane and gently press the horizontal / vertical stabilizer upside down with your thumb on the bottom of the rear airframe, downwards a few millimeters. If you do it evenly, they should auto correct and remain a bit loose. Take the backing to any sticker or wax paper of some sort and put a micro dab of super glue on it. Take an edge of the paper and put it quickly in the crack where the wings are loose, like you giving it a paper cut. There you go. You should be all set.

I will probably try this because it can't look worse than how it was assembled.
 
Fantastic, absolutely fantastic! The amount of GSE really brings even more realism. Wonderful work, congrats once again! Amazing attention to detail.
 
Top