Citrus Aviation
Active member
Howdy, folks! As my first post on this what I hope becomes a fabulous forum to discuss model airplanes I wanted to talk about how to shoot model aircraft in the great outdoors! This thread is an in-depth discussion on how to shoot your models! I have become known for taking incredible outdoor shots and wanted to share some secrets and how to do it with your models! I hope y'all find this thread helpful and look forward to seeing your great shots below!
What is needed?
All that is needed to get started is a model to shoot and a camera. While a DSLR will allow for more manual adjustments, even just an iPhone will work just as well. It is more about how the image is shot and less about the equipment used.
How to Take the Pics
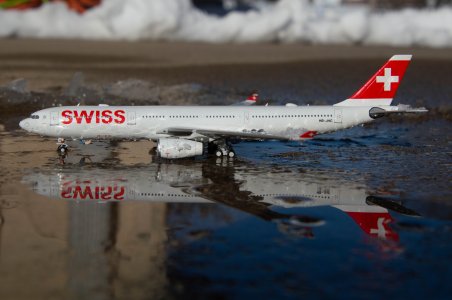
Taking photos is all about matching the aircraft to an interesting sgubjectmater or background along with good lighting. When shooting a model plane a few things should be kept in mind:
1: Lighting should be with the sun behind you.
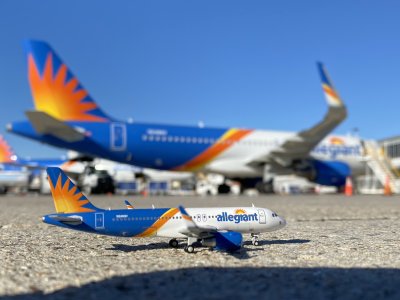
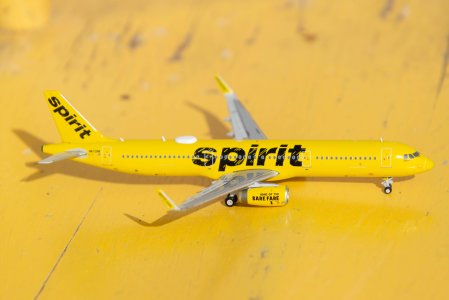
2: Rule of thirds is generally advisable. However, creative framing such as with the Allegiant A320S below can make of some cool shots.
3: Keeping the titles of the plane in focus tends to lead to a more pleasant viewing experience.
4: Centering and leveling the aprcfafvt to be square and in the middle of the shot also leads to a more pleasant viewing experience.
If you are spotting with a DSLR on a fully sunny day I recommend going for setting similar to these:
F/Stop F/9-F/11
Shuttle Speed 1/640-1/800
ISO 100-200
Editing
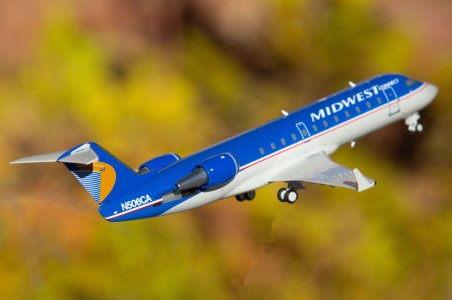
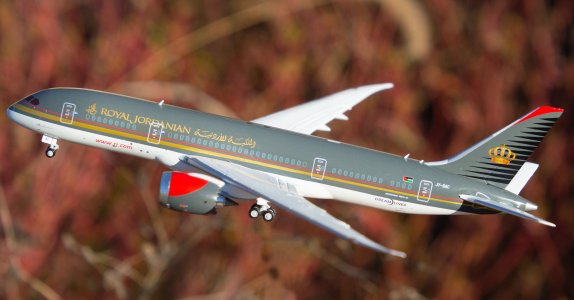
When you get home from your outdoor shoot editing will take your photos from the RAW file to a stunning image! I personally use Adobe Lightroom and Photoshop, but most basic editors will allow you to edit the images in a satisfactory manor. It is usually a good idea to make less corrects if shooting with a DSLR. It is then good to increase the sharpness and detail of the image. I will then next increase the exposure slightly as well as vibrance and saturation. These adjustments should be done in modernity or else the image will look over processed. I use Photoshop for unwanted object removal such as removing a stand from an image. You can see examples of that with the Midwest CR and Royal Jordanian 788 images. In addition for images with a sky background I remove dust pots as they can be easily seen with the solid color background. Dust spots look bad on images and removing them makes the photos look more professional. The final step is to export the image. I always export at full resolution so that if I want to reduce the image size later, I can just duplicate the dull res version, take it into PS, and downsize it there.
Once all this is done, you have an incurable outdoor model photos! This sequence works for model airport setups as well which I hope to experiment with in the future. Thank y'all so much for reading this thread! Go out there snd enjoy your collection!
What is needed?
All that is needed to get started is a model to shoot and a camera. While a DSLR will allow for more manual adjustments, even just an iPhone will work just as well. It is more about how the image is shot and less about the equipment used.
How to Take the Pics
Taking photos is all about matching the aircraft to an interesting sgubjectmater or background along with good lighting. When shooting a model plane a few things should be kept in mind:
1: Lighting should be with the sun behind you.
2: Rule of thirds is generally advisable. However, creative framing such as with the Allegiant A320S below can make of some cool shots.
3: Keeping the titles of the plane in focus tends to lead to a more pleasant viewing experience.
4: Centering and leveling the aprcfafvt to be square and in the middle of the shot also leads to a more pleasant viewing experience.
If you are spotting with a DSLR on a fully sunny day I recommend going for setting similar to these:
F/Stop F/9-F/11
Shuttle Speed 1/640-1/800
ISO 100-200
Editing
When you get home from your outdoor shoot editing will take your photos from the RAW file to a stunning image! I personally use Adobe Lightroom and Photoshop, but most basic editors will allow you to edit the images in a satisfactory manor. It is usually a good idea to make less corrects if shooting with a DSLR. It is then good to increase the sharpness and detail of the image. I will then next increase the exposure slightly as well as vibrance and saturation. These adjustments should be done in modernity or else the image will look over processed. I use Photoshop for unwanted object removal such as removing a stand from an image. You can see examples of that with the Midwest CR and Royal Jordanian 788 images. In addition for images with a sky background I remove dust pots as they can be easily seen with the solid color background. Dust spots look bad on images and removing them makes the photos look more professional. The final step is to export the image. I always export at full resolution so that if I want to reduce the image size later, I can just duplicate the dull res version, take it into PS, and downsize it there.
Once all this is done, you have an incurable outdoor model photos! This sequence works for model airport setups as well which I hope to experiment with in the future. Thank y'all so much for reading this thread! Go out there snd enjoy your collection!
.JPG")


