The “Stubbed Toe” of Model Airplanes: Broken Landing Gear

JJ Skippy

Well-known member
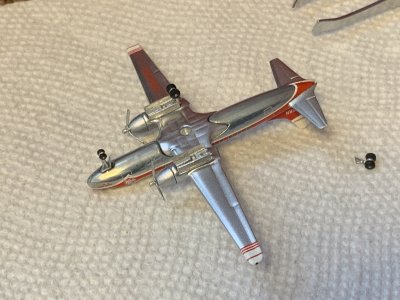
Hello everyone! I wanted to create a thread to document my experience of fixing landing gear on a new arrival that I got today: the Aeroclassics 1:400 Western Convair CV-240 (N8404H). I ordered the model off of eBay and got it for a good price; none had sold in the past three months either. Upon unboxing it, this is what I was greeted to:
A786A2AA-4E96-486A-8DA6-D4EB252830A8.jpeg

This is now what I like to call the “stubbed toe” of model airplane collecting. More than likely, it’s one of the most painful and time-consuming repairs you’ll come across in this hobby. I have done two other repairs like this before; a Delta DC-9-50 (also by Aeroclassics) and a Gemini Jets Eastern DC-9-30 in the polished livery. Since landing gear is so small in 400 scale, regardless of what aircraft type you’re working with, there’s almost no room for error. Luckily, both the previous repairs went smoothly, albeit the gears are a little askew in their places. However, it’s more difficult when the landing gear is snapped off rather than simply detached from the fuselage, and that’s what happened to the starboard (right) main landing gear.

First off, thanks goes to my wonderful father for helping out with the repair. I don’t have steady hands and enough experience with super glue to complete this repair, so I called him in for assistance. Our approach to this was to fix the easy part first; the nose gear. This part went in quite well, as you can see in the photo above (I didn’t get a photo of it with the nose gear detached before starting the repair).

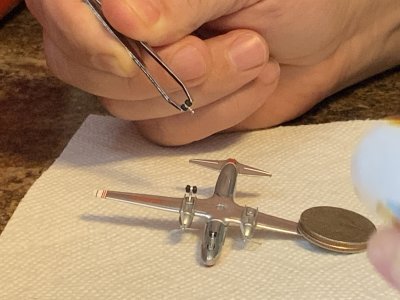
Now for the hard part: the main gear. As mentioned, this was snapped off brutally clean about midway down the strut. Good news is that the clean cuts are better than the more rugged ones. We used a pair of tweezers to get the main gear on. The two quarters you see on the wing were there to help keep the model stable so that it wouldn’t move whilst the procedure was being done.
FEC9310D-30D0-4525-A047-1DA5D3D8917F.jpeg

Attaching it is so difficult due to the extremely small surface area. We had to reapply super glue twice as we got too much in the designated spot.
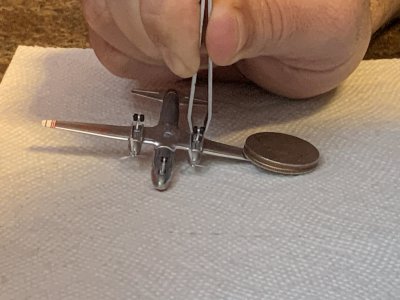
07086145-F94A-41A3-BD23-9F7D4ADBFE89.jpeg

The piece was very hard to insert due to the aforementioned reason above. It was readjusted multiple times to try and line it up with the attached left main gear. Finally, we got it in…
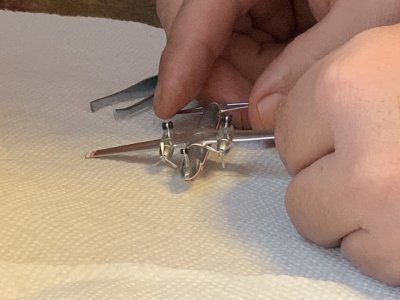
7E9356C9-45DB-477B-B1DC-86F3AD050C2C.jpeg

…and then we used the tweezers as a placeholder for the model to let the glue dry. My father recommended at least 10 minutes before touching or moving it.
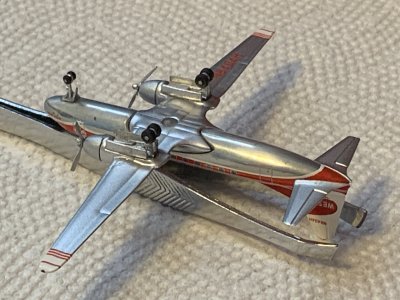
1087F869-268C-4ABD-AD81-AFCAC627A9A1.jpeg

Now, we did let too much time pass because we got caught up with some NFL football on TV.
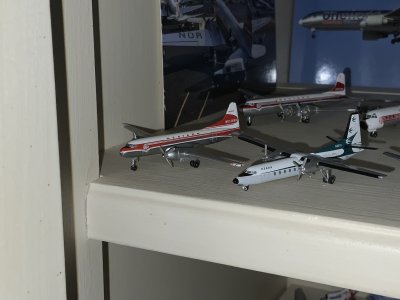
3C8F95A3-6645-47CA-B8A6-13C3741CB0A8.jpeg
The result is a miracle! Successful repair was completed and it now sits proudly on my shelf. The main gear is very minimally crooked, so I’m very delicate with setting this model down on any surface so that it doesn’t collapse under the force. I’m very happy that this was a successful repair and I look forward to having this on display!
 
Hello everyone! I wanted to create a thread to document my experience of fixing landing gear on a new arrival that I got today: the Aeroclassics 1:400 Western Convair CV-240 (N8404H). I ordered the model off of eBay and got it for a good price; none had sold in the past three months either. Upon unboxing it, this is what I was greeted to:
View attachment 9075

This is now what I like to call the “stubbed toe” of model airplane collecting. More than likely, it’s one of the most painful and time-consuming repairs you’ll come across in this hobby. I have done two other repairs like this before; a Delta DC-9-50 (also by Aeroclassics) and a Gemini Jets Eastern DC-9-30 in the polished livery. Since landing gear is so small in 400 scale, regardless of what aircraft type you’re working with, there’s almost no room for error. Luckily, both the previous repairs went smoothly, albeit the gears are a little askew in their places. However, it’s more difficult when the landing gear is snapped off rather than simply detached from the fuselage, and that’s what happened to the starboard (right) main landing gear.

First off, thanks goes to my wonderful father for helping out with the repair. I don’t have steady hands and enough experience with super glue to complete this repair, so I called him in for assistance. Our approach to this was to fix the easy part first; the nose gear. This part went in quite well, as you can see in the photo above (I didn’t get a photo of it with the nose gear detached before starting the repair).

Now for the hard part: the main gear. As mentioned, this was snapped off brutally clean about midway down the strut. Good news is that the clean cuts are better than the more rugged ones. We used a pair of tweezers to get the main gear on. The two quarters you see on the wing were there to help keep the model stable so that it wouldn’t move whilst the procedure was being done.
View attachment 9076

Attaching it is so difficult due to the extremely small surface area. We had to reapply super glue twice as we got too much in the designated spot.
View attachment 9077

The piece was very hard to insert due to the aforementioned reason above. It was readjusted multiple times to try and line it up with the attached left main gear. Finally, we got it in…
View attachment 9078

…and then we used the tweezers as a placeholder for the model to let the glue dry. My father recommended at least 10 minutes before touching or moving it.
View attachment 9079

Now, we did let too much time pass because we got caught up with some NFL football on TV.
View attachment 9081
The result is a miracle! Successful repair was completed and it now sits proudly on my shelf. The main gear is very minimally crooked, so I’m very delicate with setting this model down on any surface so that it doesn’t collapse under the force. I’m very happy that this was a successful repair and I look forward to having this on display!
Glad that the repair went well. You're right, repairing landing gear is pretty tedious, about the only thing worse is trying to put tires back on the axle.
 
Glad that the repair went well. You're right, repairing landing gear is pretty tedious, about the only thing worse is trying to put tires back on the axle.
I’ve only had that happen a few times but never get them back on just because it’s so difficult.
 
I’ve only had that happen a few times but never get them back on just because it’s so difficult.
It's happened to me a few times. I once spent almost 4 hours trying to put the tires back on the left main landing gear of an Aeroclassics BAC 1-11, and once I finally got them on, one of the tires on the right gear popped off..
 
Glad that the repair went well. You're right, repairing landing gear is pretty tedious, about the only thing worse is trying to put tires back on the axle.
Oh I had that happen with one of my NG's. One of the tires on the right main gear popped off so I tried to attach it back on but it was very tiny. Then I decided to flip the sides of the wheels around since there isn't much difference with them and put glue on them and it worked quite well. I then had it lay on its back for the night (I didn't have any spare blankets and pillows for it unfortunately) and the next day (maybe it was that same night) the plane acted like nothing popped off of it! The plane is pretty good at convincing me nothing happened though I don't get fooled that easily.
 
Hello everyone! I wanted to create a thread to document my experience of fixing landing gear on a new arrival that I got today: the Aeroclassics 1:400 Western Convair CV-240 (N8404H). I ordered the model off of eBay and got it for a good price; none had sold in the past three months either. Upon unboxing it, this is what I was greeted to:
View attachment 9075

This is now what I like to call the “stubbed toe” of model airplane collecting. More than likely, it’s one of the most painful and time-consuming repairs you’ll come across in this hobby. I have done two other repairs like this before; a Delta DC-9-50 (also by Aeroclassics) and a Gemini Jets Eastern DC-9-30 in the polished livery. Since landing gear is so small in 400 scale, regardless of what aircraft type you’re working with, there’s almost no room for error. Luckily, both the previous repairs went smoothly, albeit the gears are a little askew in their places. However, it’s more difficult when the landing gear is snapped off rather than simply detached from the fuselage, and that’s what happened to the starboard (right) main landing gear.

First off, thanks goes to my wonderful father for helping out with the repair. I don’t have steady hands and enough experience with super glue to complete this repair, so I called him in for assistance. Our approach to this was to fix the easy part first; the nose gear. This part went in quite well, as you can see in the photo above (I didn’t get a photo of it with the nose gear detached before starting the repair).

Now for the hard part: the main gear. As mentioned, this was snapped off brutally clean about midway down the strut. Good news is that the clean cuts are better than the more rugged ones. We used a pair of tweezers to get the main gear on. The two quarters you see on the wing were there to help keep the model stable so that it wouldn’t move whilst the procedure was being done.
View attachment 9076

Attaching it is so difficult due to the extremely small surface area. We had to reapply super glue twice as we got too much in the designated spot.
View attachment 9077

The piece was very hard to insert due to the aforementioned reason above. It was readjusted multiple times to try and line it up with the attached left main gear. Finally, we got it in…
View attachment 9078

…and then we used the tweezers as a placeholder for the model to let the glue dry. My father recommended at least 10 minutes before touching or moving it.
View attachment 9079

Now, we did let too much time pass because we got caught up with some NFL football on TV.
View attachment 9081
The result is a miracle! Successful repair was completed and it now sits proudly on my shelf. The main gear is very minimally crooked, so I’m very delicate with setting this model down on any surface so that it doesn’t collapse under the force. I’m very happy that this was a successful repair and I look forward to having this on display!
Fantastic repair JJ
 
Excellent fix JJ! It looks good as new! I like to sit models upside down in their cradles when I do a repair, it’s very steady. Fixing broken wheels is a pain, and especially when you don’t want to stop them from being able to roll.
 
Excellent fix JJ! It looks good as new! I like to sit models upside down in their cradles when I do a repair, it’s very steady. Fixing broken wheels is a pain, and especially when you don’t want to stop them from being able to roll.
Thank you! The wheels on this Convair like to spin very easily so it was hard to get the gear on without it spinning and falling off the tweezers.
 
Very helpful thread and an excellent tidy fix 👍 I’ve done this exact repair on a couple of DC-10’s where the nose gear had snapped clean off at the stem. It was so tricky keeping it straight and level whilst holding in place with tweezers while the glue went off, which was such a pain, but I managed both repairs successfully. Didn’t touch the models until the next day! I then used a little silver paint afterwards to hide the join.

I also have an AC BAC 1-11 which had both the main port & starboard gear snapped clean off on delivery, but being so small, I just couldn’t do the same repair successfully. In the end I soaked the model in warm water with a bit of washing up liquid and this loosened the remaining gear inserts which I was then able to remove, so at least I can put in some fresh replacements if/when I eventually find a pair.
Yes, the gear on those BAC 1-11 are tiny. Did Aeroclassics put spare BAC 1-11 gears in any of their spare parts packs? I can't remember.
 
Yes, the gear on those BAC 1-11 are tiny. Did Aeroclassics put spare BAC 1-11 gears in any of their spare parts packs? I can't remember.
They really are so tiny that I could not even keep them in place with tweezers to do that fix! Lucky I gave up and walked away from it before losing my temper lol. Good call - just checked on Jet Collector and they do have 4 types of spares packs available. Sadly none have BAC 1-11 gear but will pick up a few anyway as these are still handy to have as backup for other types. I might have to look for a donor model for the fix but this will involve trying to extricate the gear from that in one piece, using the soaking in water trick again (y)
 
They really are so tiny that I could not even keep them in place with tweezers to do that fix! Lucky I gave up and walked away from it before losing my temper lol. Good call - just checked on Jet Collector and they do have 4 types of spares packs available. Sadly none have BAC 1-11 gear but will pick up a few anyway as these are still handy to have as backup for other types. I might have to look for a donor model for the fix but this will involve trying to extricate the gear from that in one piece, using the soaking in water trick again (y)

Seems like they have everything in those packs except the BAC 1-11. A donor model is a good idea, especially if you can get it cheap.
 
Hello everyone! I wanted to create a thread to document my experience of fixing landing gear on a new arrival that I got today: the Aeroclassics 1:400 Western Convair CV-240 (N8404H). I ordered the model off of eBay and got it for a good price; none had sold in the past three months either. Upon unboxing it, this is what I was greeted to:
View attachment 9075

This is now what I like to call the “stubbed toe” of model airplane collecting. More than likely, it’s one of the most painful and time-consuming repairs you’ll come across in this hobby. I have done two other repairs like this before; a Delta DC-9-50 (also by Aeroclassics) and a Gemini Jets Eastern DC-9-30 in the polished livery. Since landing gear is so small in 400 scale, regardless of what aircraft type you’re working with, there’s almost no room for error. Luckily, both the previous repairs went smoothly, albeit the gears are a little askew in their places. However, it’s more difficult when the landing gear is snapped off rather than simply detached from the fuselage, and that’s what happened to the starboard (right) main landing gear.

First off, thanks goes to my wonderful father for helping out with the repair. I don’t have steady hands and enough experience with super glue to complete this repair, so I called him in for assistance. Our approach to this was to fix the easy part first; the nose gear. This part went in quite well, as you can see in the photo above (I didn’t get a photo of it with the nose gear detached before starting the repair).

Now for the hard part: the main gear. As mentioned, this was snapped off brutally clean about midway down the strut. Good news is that the clean cuts are better than the more rugged ones. We used a pair of tweezers to get the main gear on. The two quarters you see on the wing were there to help keep the model stable so that it wouldn’t move whilst the procedure was being done.
View attachment 9076

Attaching it is so difficult due to the extremely small surface area. We had to reapply super glue twice as we got too much in the designated spot.
View attachment 9077

The piece was very hard to insert due to the aforementioned reason above. It was readjusted multiple times to try and line it up with the attached left main gear. Finally, we got it in…
View attachment 9078

…and then we used the tweezers as a placeholder for the model to let the glue dry. My father recommended at least 10 minutes before touching or moving it.
View attachment 9079

Now, we did let too much time pass because we got caught up with some NFL football on TV.
View attachment 9081
The result is a miracle! Successful repair was completed and it now sits proudly on my shelf. The main gear is very minimally crooked, so I’m very delicate with setting this model down on any surface so that it doesn’t collapse under the force. I’m very happy that this was a successful repair and I look forward to having this on display!
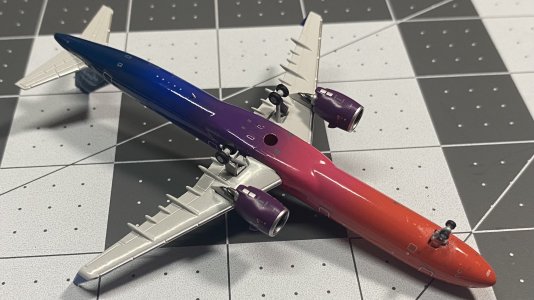
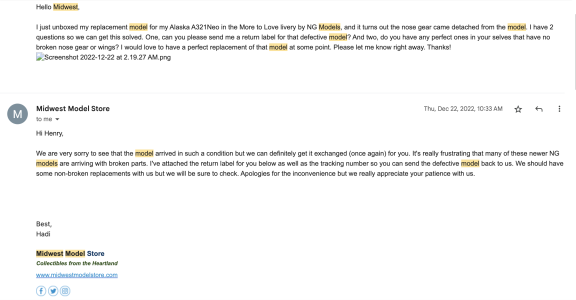
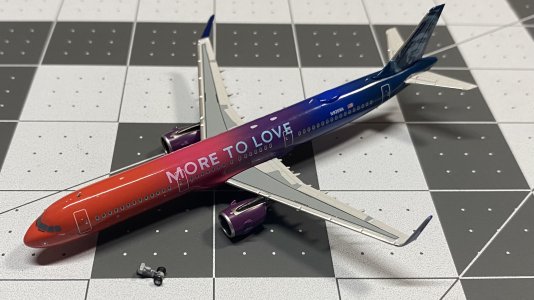
I had that same issue when I unboxed my Alaska A321Neo in the More to Love livery replacement by NG Models. Unfortunately the nose gear did came off when I took it out. So it was unfortunate that my 2nd replacement also came in a bad condition. I did asked Midwest if I can have another replacement, they did send a return label. However, I didn't want to return two broken Alaska A321s in one box, so I decided to replace the one with the broken landing gear.
Screenshot 2023-01-14 at 2.59.22 PM.png

So I did start the repair process for my 2nd replacement. I used a cotton swab and a specific super glue that can repair the model in one go. The super glue I used helps stick the piece together in just a few minutes. The picture you're seeing is what the model looked like before
IMG_3761.jpeg
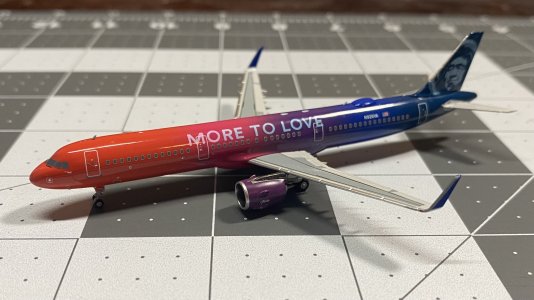
And the next two images is the model after the repair. It was a bit hard to get the nose gear in place, but the final product turned out to be not bad! There was a bit of smear of the super glue, but it can't be seen from a distance. Overall, I think I did a great job on the repair on this model! I guess I don't need a third replacement after all!IMG_3762.jpegIMG_3763.jpeg
 
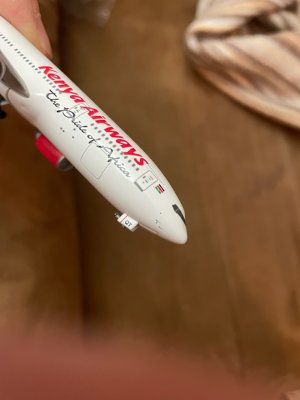
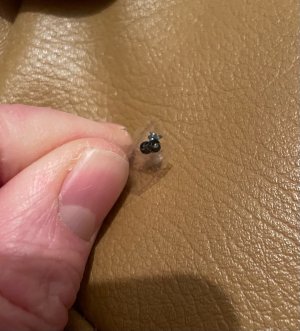
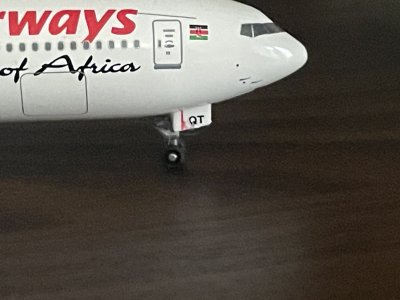
Now I’m also a member of this thread here. Before Christmas I acquired this Dragon Wings 777-200 from Kenya Airways on eBay. And it arrived with broken front landing gear. 🙁
F779E95F-0C37-4B4A-8721-1B30F3215642.jpeg
0F06DE9D-D9A3-4946-A8B1-4F86CE01F7D8.jpeg
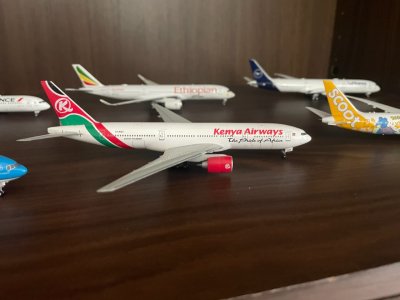
After some back and forth I got a full refund from eBay and then tried if it can be fixed. And it wasn’t easy… as also some other people here described, I had to apply plenty of the super glue as the surface for attachment was so small. But in the end it worked out. Only that a bit of glue ran on the landing gear door and blurred the paint there a bit and the front landing gear looks a little bit crooked. But in the end, considering that without the repair I could have thrown the plane, now I can really live with the result. 😊
F582CA26-EA21-4204-8FD1-5A01DAE34C10.jpeg6C3A2E4E-F579-41A9-86EA-883FEC970E80.jpeg
 
Ahh, sucks to get a model like that. Glad the repair went smoothly and the fact that you got the refund.
Yes, I was really disappointed when I unboxed it. But now, as you said, since the repair went ok and left only relatively little scars on the plane, it’s fine. Especially as the plane was for free in the end, due to the refund. 😊
 
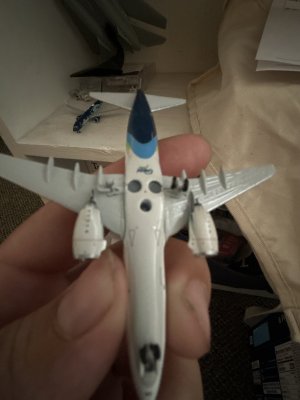
Sigh…….staff moved my stuff around when I told them to not touch my models and broke the landing gear in the process….. is there replacements online somewhere? I was hoping to use this one in a future model airport.

-Kaidyn
image.jpg
 
Top